Friday, January 23, 2015


There's a giveaway.... Look at this beautiful painter's chest. Everyone stop in and look at some tiny delicate work.

 http://bagusitaly.blogspot.com

Sunday, February 10, 2013

Stove and Refrigerator

 Here are a couple pictures of my stove and refrigerator for the house. I didn't really get any "in-process" photos so these will have to do. :)

Both are made out of matte board and some small pieces of wood. The burners are made out of snap pieces that I had laying around. I still need to attach the handles for the stove.


Saturday, February 9, 2013

Cellar doors


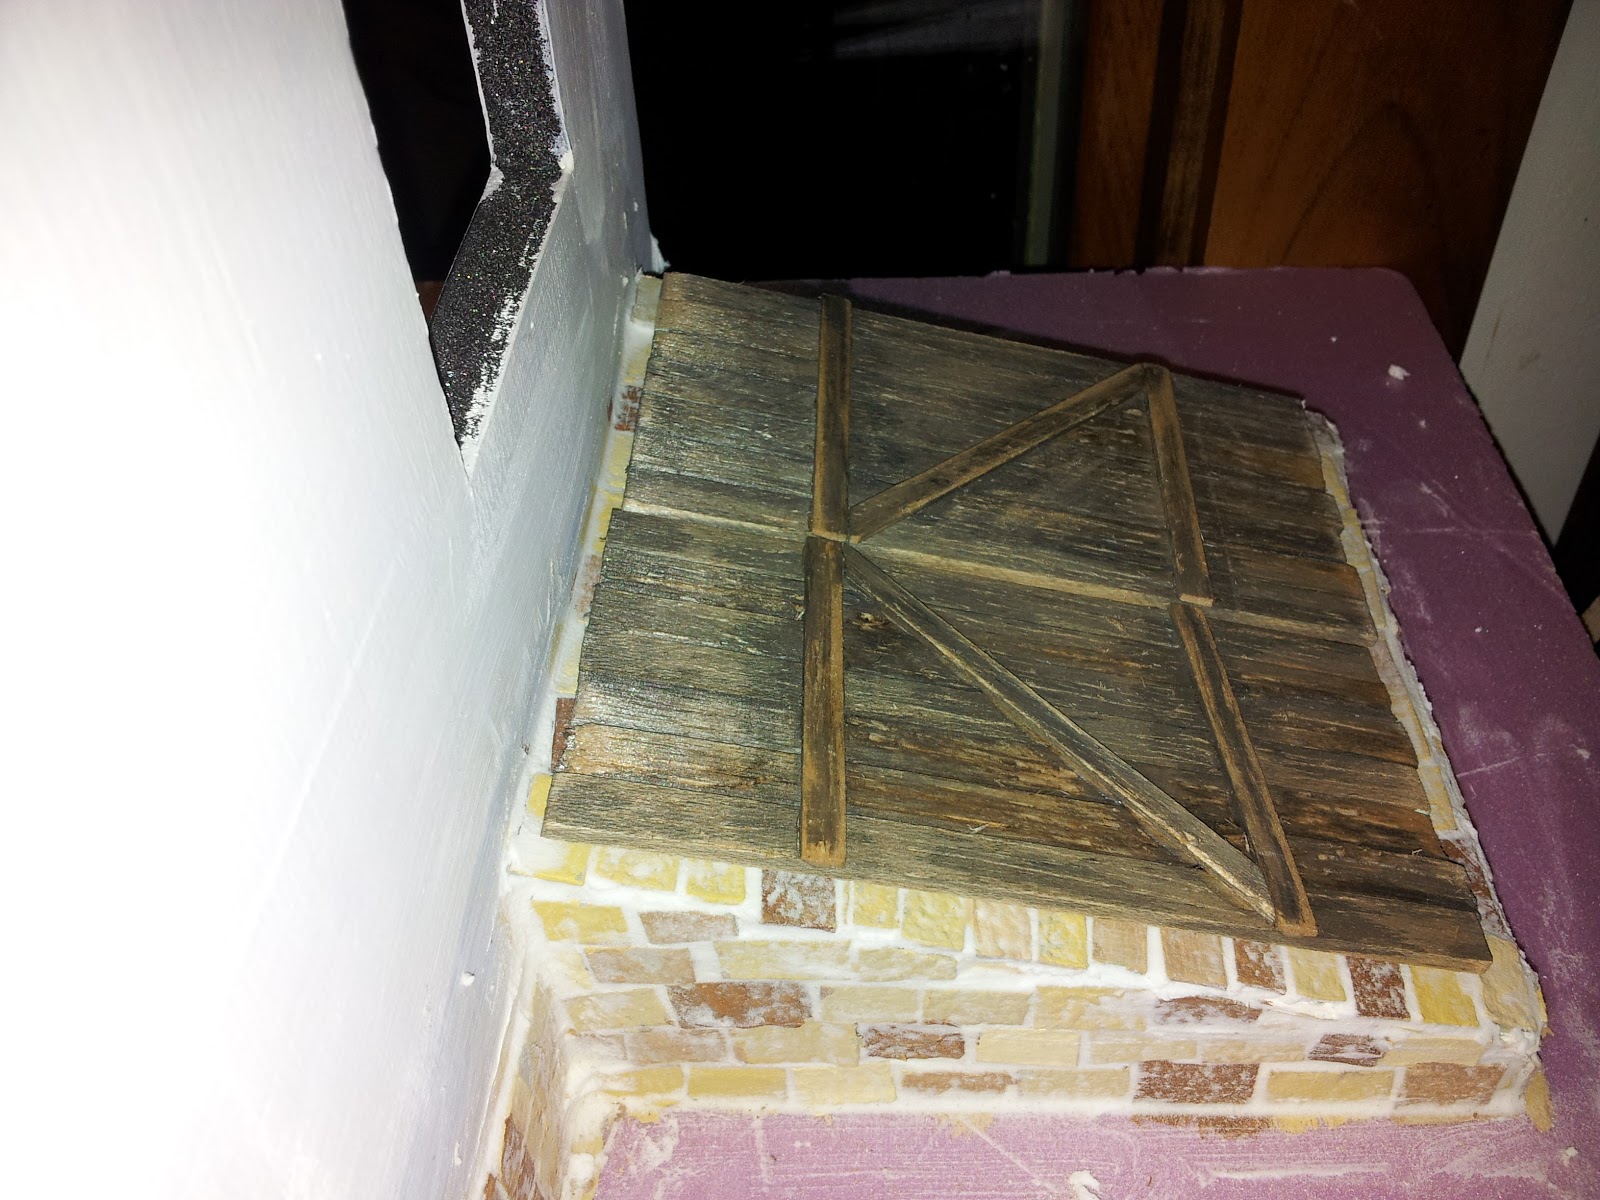
Underneath the doors is the electric system of to the house. I decided to finish my cellar doors. I had worked on them awhile ago but got stuck on the hinges. I wanted to make them, but wasn't sure what to use. Then one day, I thought about Tim Holtz
Grunge board. It is very study, and doesn't tear easily  and you can cut it with scissors or a xacto knife.


I love how they turned out. ;) After I painted them black I let that dry and touched them with a rust color paint. After that all dried, I used gloss varnish. I also wanted the hinges to have nails in them. I have a thick black dimensional paint and used that and dabbed it on where the nails would be.  It added the dimension that I needed for it to look like nail heads.


Living Room Floor


Been trying to decide what kind of floor I wanted in the living room. I did some research and it seems that most old houses had wood floors. I like the looks of the old plank flooring. So, I decided that is what I would put in this house.

I cut my wood to size and then used an xacto knife to mark it up and trim off the sides of the "planks". Some of the boards broke when I cut them on the ends, so I kept it that way so it would look like there were holes in the floor. I remember one house we lived in that had several boards that had broke over the years and little chips were missing. One of the boards you could see straight down to the basement. During the winter it was cold there, you could feel the breeze blowing up from the basement. Brrr.....

I made my paper floor template and then added the wood planking. ;)  Once the glue was dry I drilled tiny holes in the boards to resemble nail holes. I tried to figure out what to put into the holes that would dry quickly and would look dark like a nail head. I decided to add a little bit of black and brown paint to some filler and it turned out great. Here is a picture of the flooring with all the holes covered. (a little messy)

 Once that was all dry I used stain all over the flooring, wiped it off and then dabbed some more stain in spots to create a few dark areas. 


I still need to sand the floor down a little bit to take the "new" look off. But, I love the way it turned out.


The beginning of the Dining Room

Worked on the dining room. Nothing fancy, I used some scrapbook paper that my friend gave me for the wallpaper and the flooring. I love how well it blends together. I thought both looked like it would fit into an old farmhouse. For the flooring I cut out a template of the floor and then glued on the paper, made some impressions in the paper to resemble linoleum squares. I used an antique gold paper for the outside border of the room. I then added some paint here and there and once that dried, I sanded the paper and paint. Need it to have that worn look. ;)  Finally I added a coating of matte varnish and sanded that some after it dried. I really like the looks of it. The kitchen is off to the left of the room, and the door goes out to the front porch. :)


Friday, February 8, 2013

An update of the Console Radio

Been working a bit more on my Console Radio.  Still have some details to add and then the fun stuff. ;) I wasn't sure about the painting at first. The first coat was a bright orange, then a chocolate color and then covering of burnt umber. I really like the coloring. After the paint has dried I did two coats of gloss varnish. Turned out pretty close to the actual color.


Another old radio but this time....

I have been busy with life but the other day I did get to go to Radio Shack and get some "goodies."  Lots and lots of electronic components to play with. LOL ;)

The idea of making something turn on or light up or move is fascinating me.

I began working on a new project last night. A 1937 Console Floor Radio. 


 I will put together a small tutorial if anyone would be interested. First I need to make sure everything works like it should in my head. :) I seem to work best hands on. So, I will be working on finishing this up today, and we will see what happens.


                                                                                                                              I plan on having a cheap mp3 player that I have taken apart inside the radio.


Thanks to Holly over at Greenleaf forum, for sharing her wonderful memories of sitting and listening at her Grandparents house to the radio shows. Times sure where different and I am sure in many ways nicer back then. I have some 1940's Radio shows and music on it. I am going to add a speaker to the mp3 and see about setting up a power button on the radio to work the player. Wish me luck.