Tuesday, February 5, 2013

Old working Radio

I made a working Radio. I made the radio from cardstock and matte board, it got me thinking about making it a working radio. So, I went to my local Radio Shack and got the components to make a circuit board that will record and play back some music. I want to make it record a little longer but here is a sample. :)

I think some Oldies playing in the Old Farmhouse will sound great!

(sorry for the background noise, our house is seldom quiet ;))


       Here is a close up. I got the design from Kris 


Sunday, February 3, 2013

Made Gramma a rocker

Been experimenting with soldering. I have never soldered much, just a little to put lights into the dollhouses. I decided I wanted to try my hand at soldering a piece of furniture. I wrapped and cut the wire, then did the soldering. Nothing fancy, but I like the looks of it, for the first one.

After I took this picture I sanded the legs down a bit more. It was fun, I think I am going to work on some lights now. Hmmm... maybe a chandelier. ;)


From new to old and well used

I purchased a bakers table. It looks nice as is, but not for my "old" farmhouse. LOL


So, I needed to dirty it up a bit. My daughter helped me scratch it up. ;)


Saturday, February 2, 2013

The beginning of a Fireplace

Here is the beginning of my fireplace. There is foam core under the wood. I found some scraps of miniature bricks.I LOVE these!!! I have never used them before, but feel in love with them. I have it painted with the distressing solution. This stuff is great!


I then covered it with crackle paint and then wicker white paint. I touched some of the paint in spots with a paper towel to lift it off. I bought the fire kit from Evans Model Trains This is the first time I have used their stuff. They are all LED's so they will not get hot. It comes with 3 colored LED's and a piece of cellophane, and it flashes.
Here is the end result. I used some pieces of sticks I found outside, I used gallery glass paint and painted on a piece of clear plastic, let it dry and then used pieces of that with the wood to create the fire look. It sparkles just like a real fire. Too bad it didn't have the crackling sounds... hmmm.....I... wonder........... ;) Might have to try a few things.


Making molds and Castings

Been experimenting with making molds and casting. It is fun!!!  Part of what I love about this house is all the architectural details it has. But, that is also a problem as in miniature there is nothing like what this house has on it. So, I need to make my own doorway and window pediment, as I can not find anything like these.


I had some resin molding and used a small piece of that, cut several strips of card stock with decorative scissors and glued those together, then added a couple pieces of matte board and some brackets. It turned out pretty close to what is on the house.


I had to make the windows also. They are alittle bit bigger in length then what you can find in miniature. I love the looks of the pediment.

Here is what the molds look like and the first of each size casting.


Now I have all the castings done. They are so fun to make. I have found a new way to make the miniature things that I need and not have to buy all of it. I like that.


Friday, February 1, 2013

Vintage Sink

Been making a sink. First, I used some scraps of matte board and a couple small pieces of wood for the top part so I could sand that to make the ridges in it. I used a sauce container for the sink itself.

I then covered it with Gesso, sanded that and then a coating of white and a couple of coats of triple thick gloss.

Of course, I don't want it to be "new" looking so my friends at Greenleaf forum told me about using a combination of Indian ink and alcohol to create a blend to use on anything to make it look "old and grungy" ;) I love this stuff. Cheap and it makes wood look great!!!


Vintage Pantry and Blogger apps

I am testing out some apps for my ipad and blogger. So far, haven't find any that I really love. This one isn't too bad but if the blog seems alittle "off" that is way. Hopefully I can find an app that works great with the ipad. If anybody has any suggestions I would love to hear them.

Here is a picture of my pantry. I love the look and feel of it. I can't wait to start filling it with all kinds of vintage items.


Trying to make a LED candle


I have been playing with LED's. I would really like to make my lights for this house as I can not afford to purchase all of them, plus I like being able to make them myself. Unique and different. I had some "mini" friends recommend going here for some tutorials and to purchase of "parts" for my fixtures. Love this site, she has so many great things to use for lights and you don't usually find anything like what she has. Another lady has been working on LED's and using them for her house. Her blog is here and full of information as well. 

So, I had some chip LED's I had bought from Evan Designs. I decided to experiment a bit and dipped one of them into Triple Thick and hung it upside down to dry so it would get the appearance of a candle. After it was dry I dipped it again to get a little thick "flame", again hung that to dry upside down. After that was dry I dipped it into amber stained glass paint. Hang to dry again. While it was drying I cut a small piece of cardstock and rolled it with a toothpick to create the candle. Once the flame was dry I put the wires down inside the cardstock candle. Put that into a bead that I had added a globe too. I really like the realistic look of it. Now going to work at making a chandelier. 


Thursday, January 31, 2013

Turning Cardboard into Clapboard Siding

Well, it's been a while since I posted, but I have been working on the house. Will update in the next few days. I have been working on using cardboard (soda and cereal boxes) for clapboard siding. I have seen so many other miniaturists use it and it turns out great! My first experiment was a FAIL!!! 


Second time turned out great. It will take a little longer to do, but I love the look. The trick seems to be to make sure both sides have equal amounts of something on them. i.e.glue on one side and paint on the other. I love how it turned out. Now to save lots of boxes. :)


Wednesday, October 24, 2012

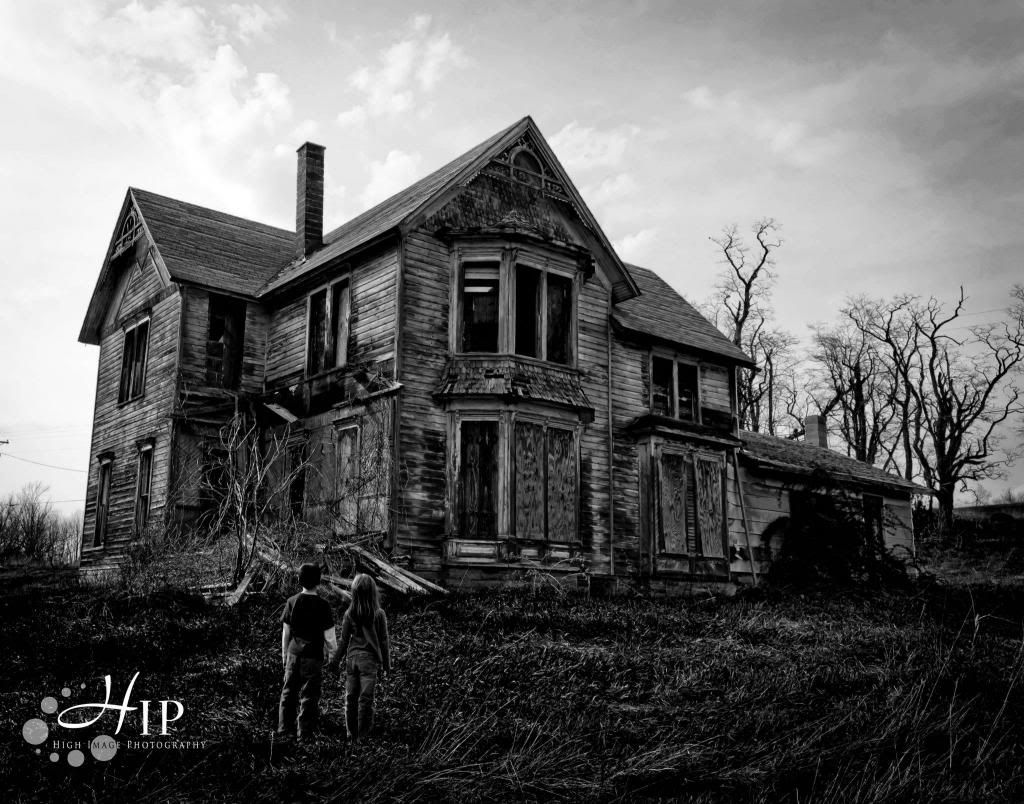
The Inspiration photo

I just realized that I never posted the Inspiration photo that made me want to create this house. I love this photo. My cousin, Tracy took this photo of his kids and the house. I was immediately taken by this house and the stunning detail in the architectural details. He is a very talented photographer.